modeller | Instructions
Here is the PDF version of our complete instructions for assembling and installing your modeller system. It contains all the same information as you will find in the instructions below.
PDF Download
Instructions
Rails
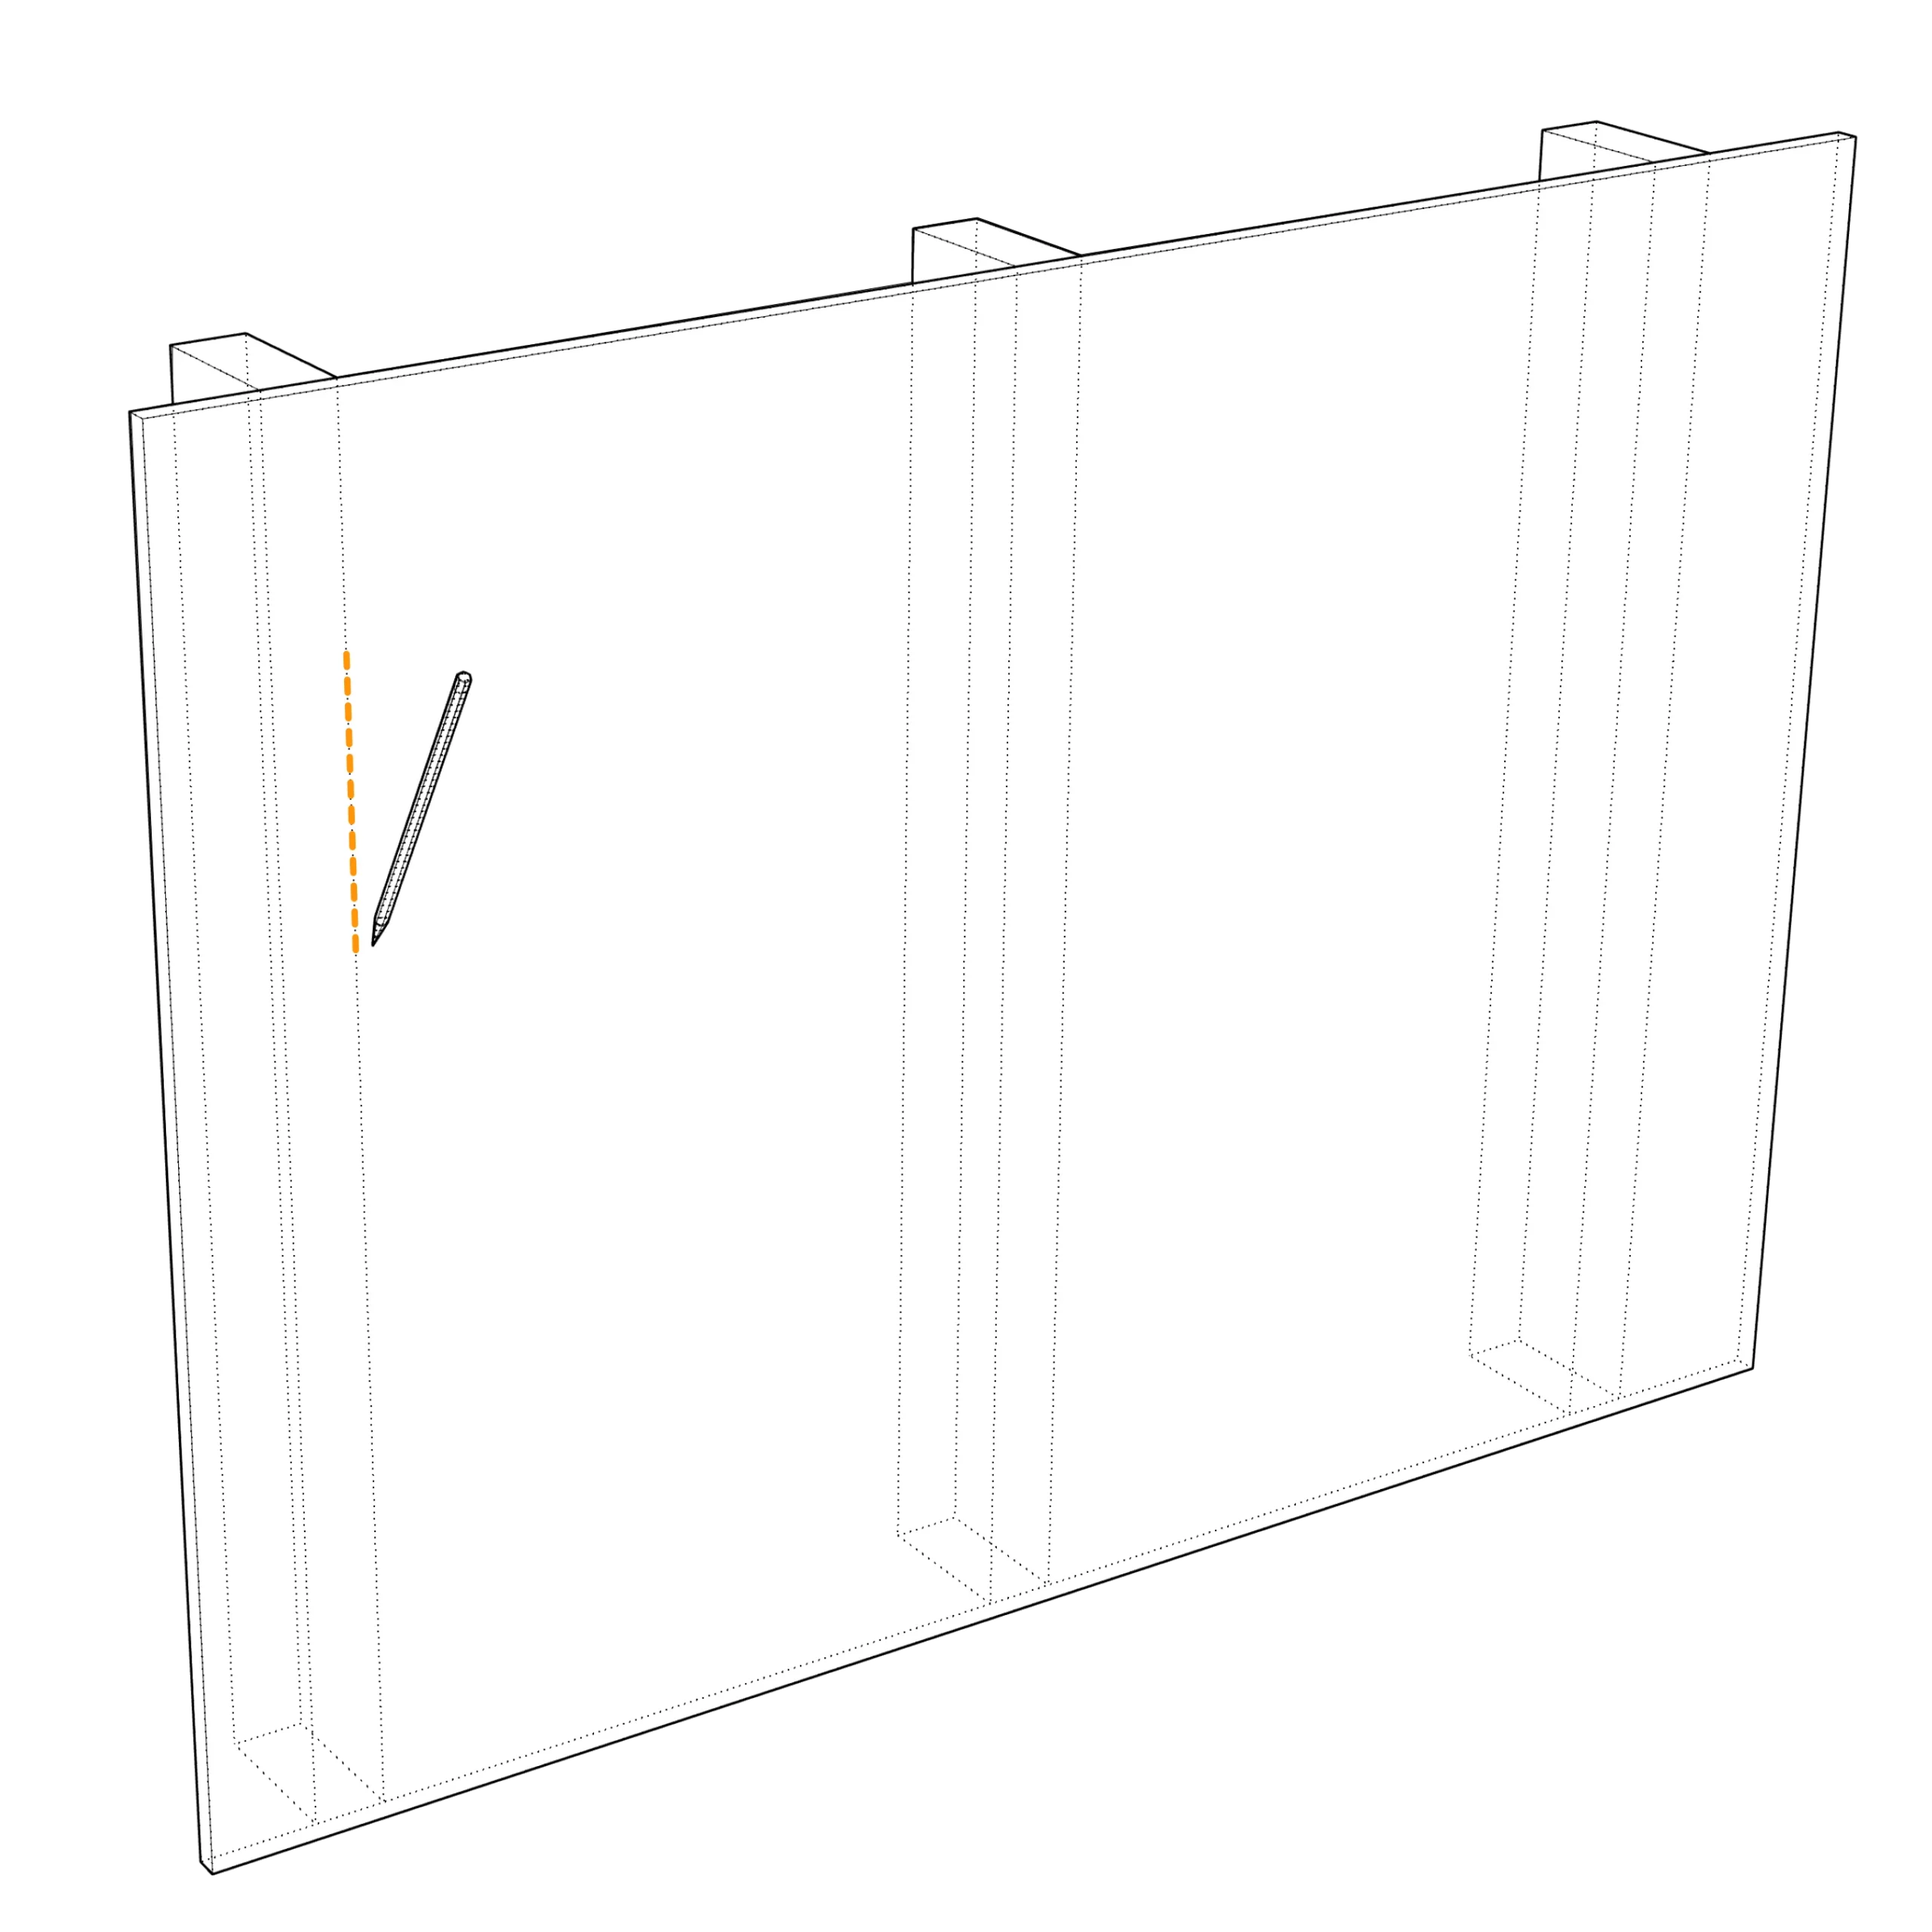
Step 1. Wall Studs
Step 1. Wall Studs Mark both sides of each 1½” stud location within the wall (usually 16” apart; mark each second stud for a 32” wide system setup). Using a strong neodymium magnet works well. It will stick to the dray wall screw heads. 2” GRK small head finishing screws are provided for wood studs. Installing support rails over wall studs makes for an easier and more robust installation, but it is not essential. Rails can be installed anywhere; when using the proper anchors, select the correct anchors for any holes that don’t hit a stud.
Step 2. First rail
Choose where you want to place your first rail. Mark your desired height at the top. Pre-drill a hole at the top to ensure you hit a stud. Screw a fastener in the top spot first but not entirely, so the rail can still move. Hold the level along its length to ensure it is vertical and aligns with the stud. Once satisfied with the location, height and alignment, use the rail as a drill guide for the remaining holes after pre-drilling each hole through the rail screw in the remaining mounting screws.
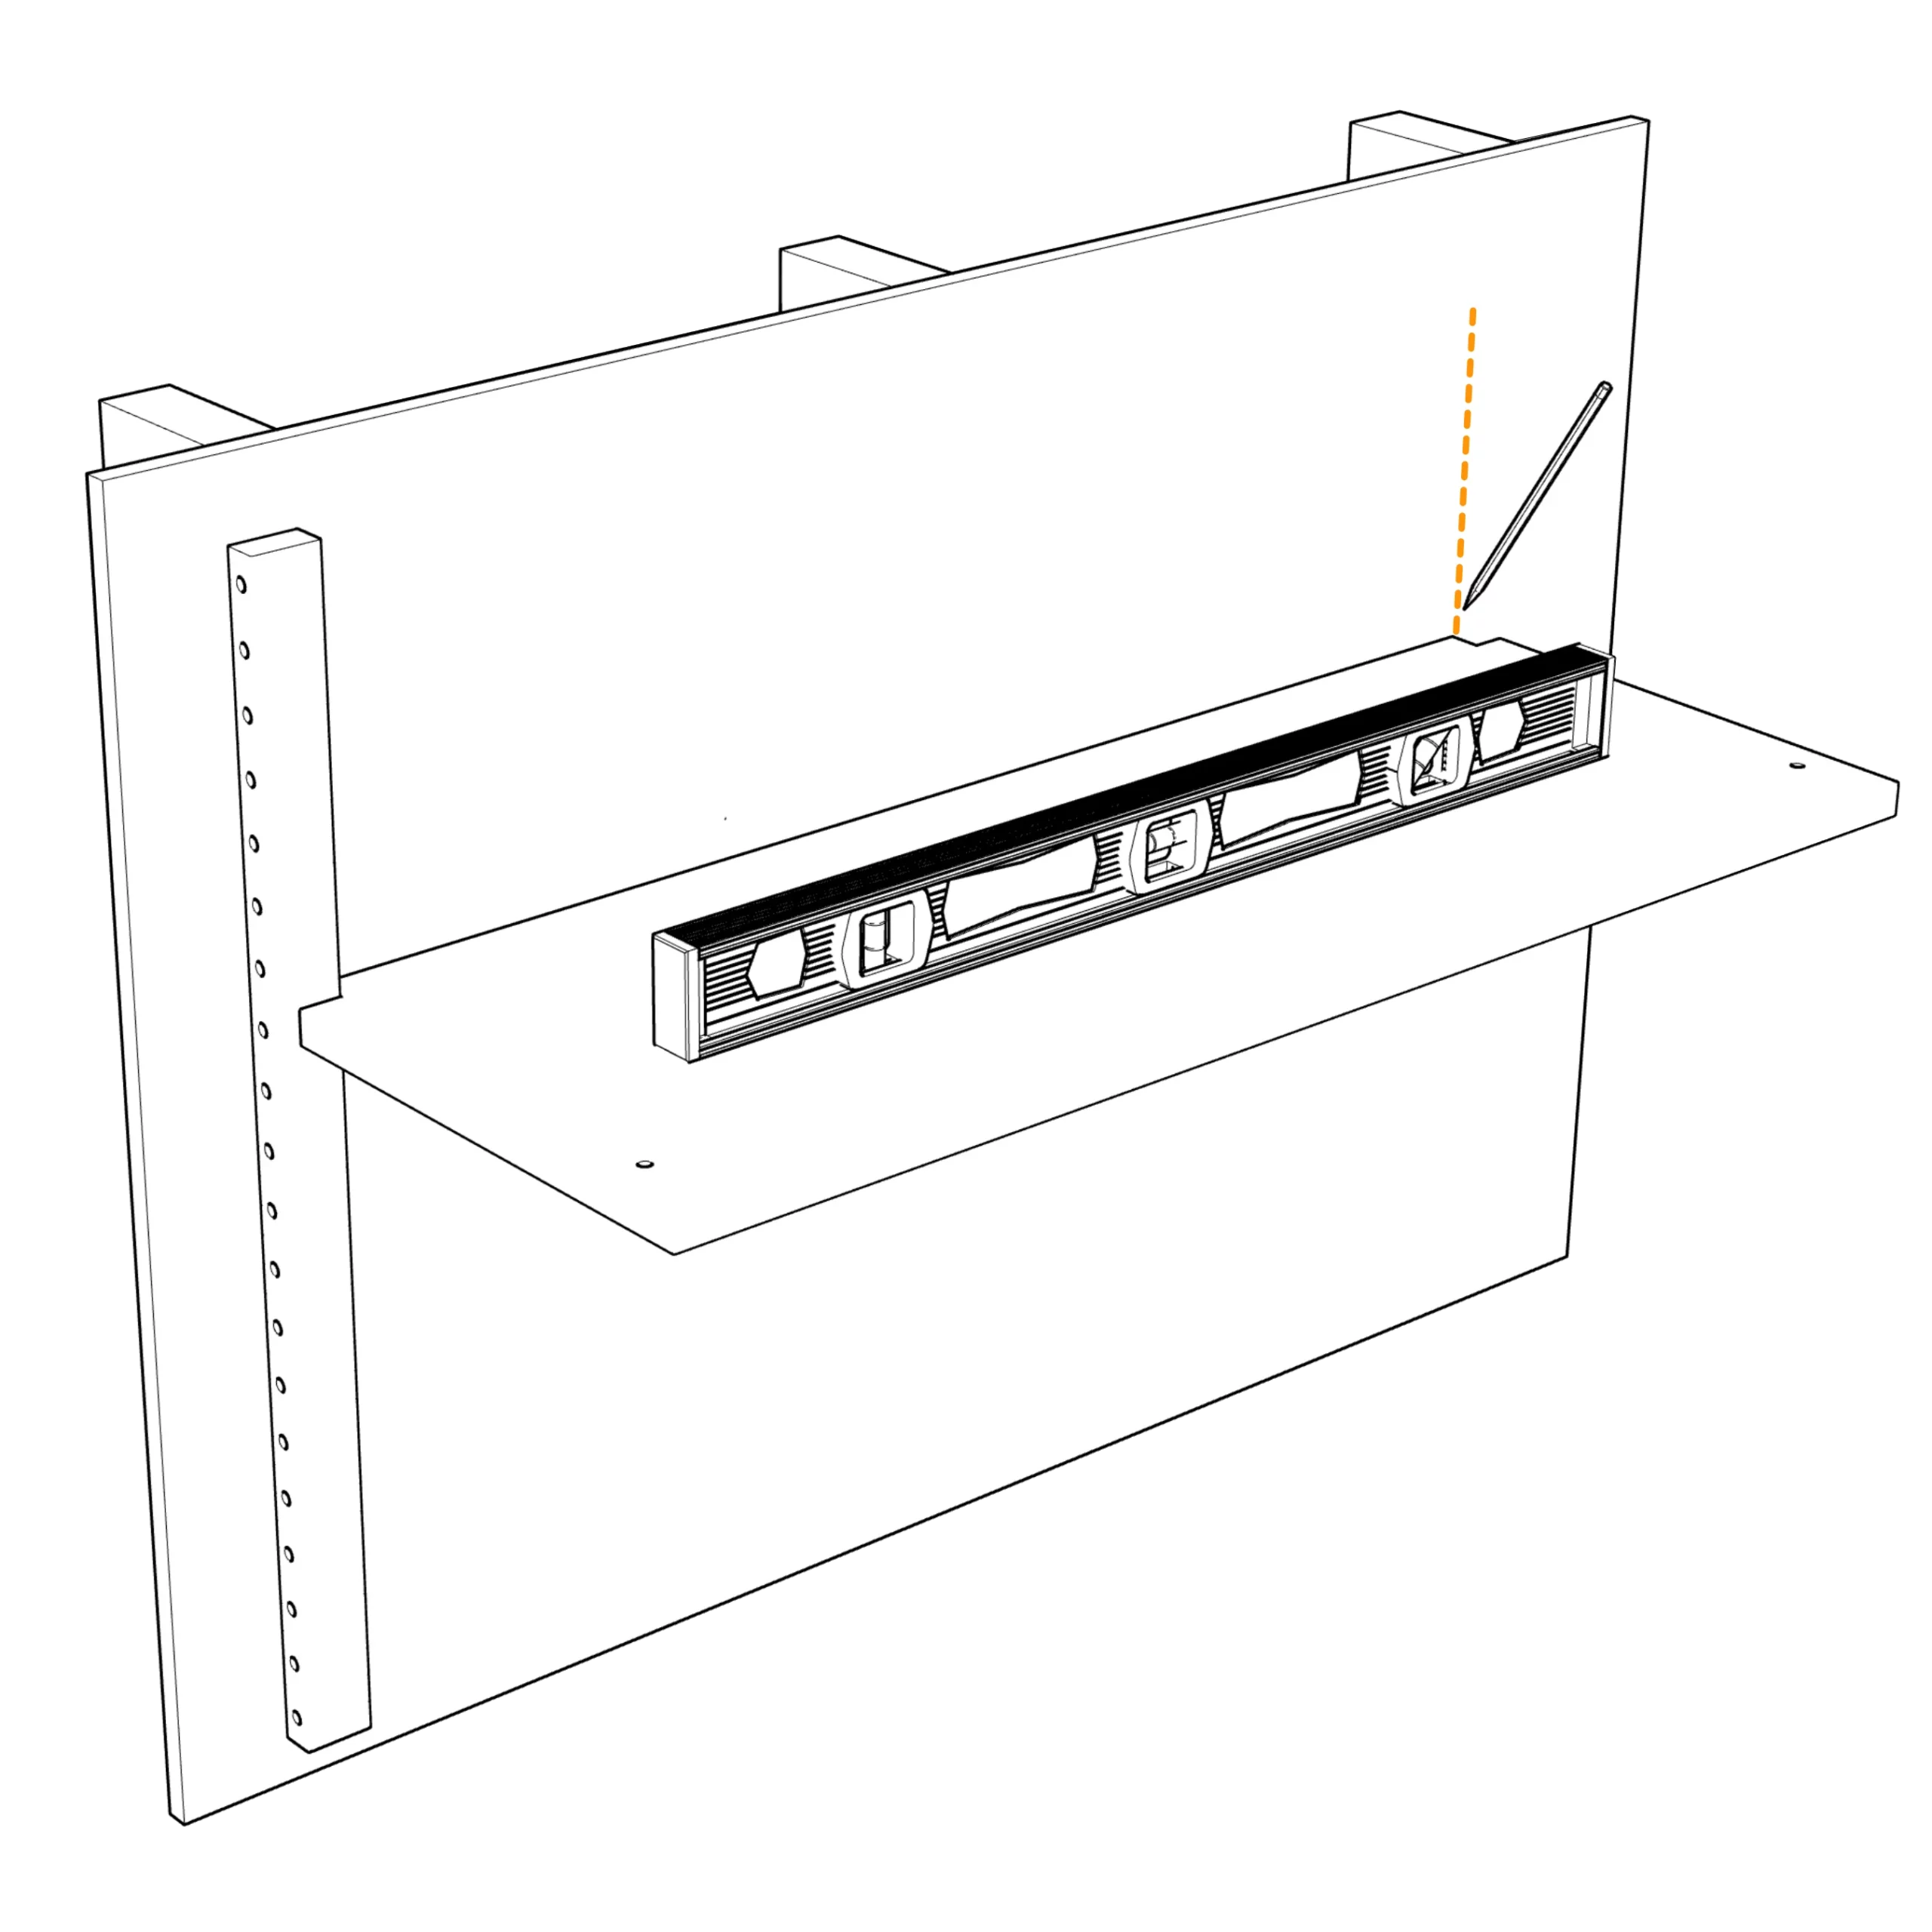
Step 3. Rail Spacing
Using a shelf with a level placed on it as a guide, mark the second rail’s position in two spots, top and bottom. Check that a shelf fits comfortably between the rails along its entire length before mounting more rails. Mark the minimum level gap required for the shelf; there should be a maximum of 1/8” gap between shelves when installed.
Step 4. Rail Alignment
While holding the second rail in position, place a 4’ level or another straight edge across the top of both rails to ensure they are at the same height so all the holes line up. Next, mark the level height of the second rail. Then, attach the second rail using the same method as the first.


Shelves
Installation
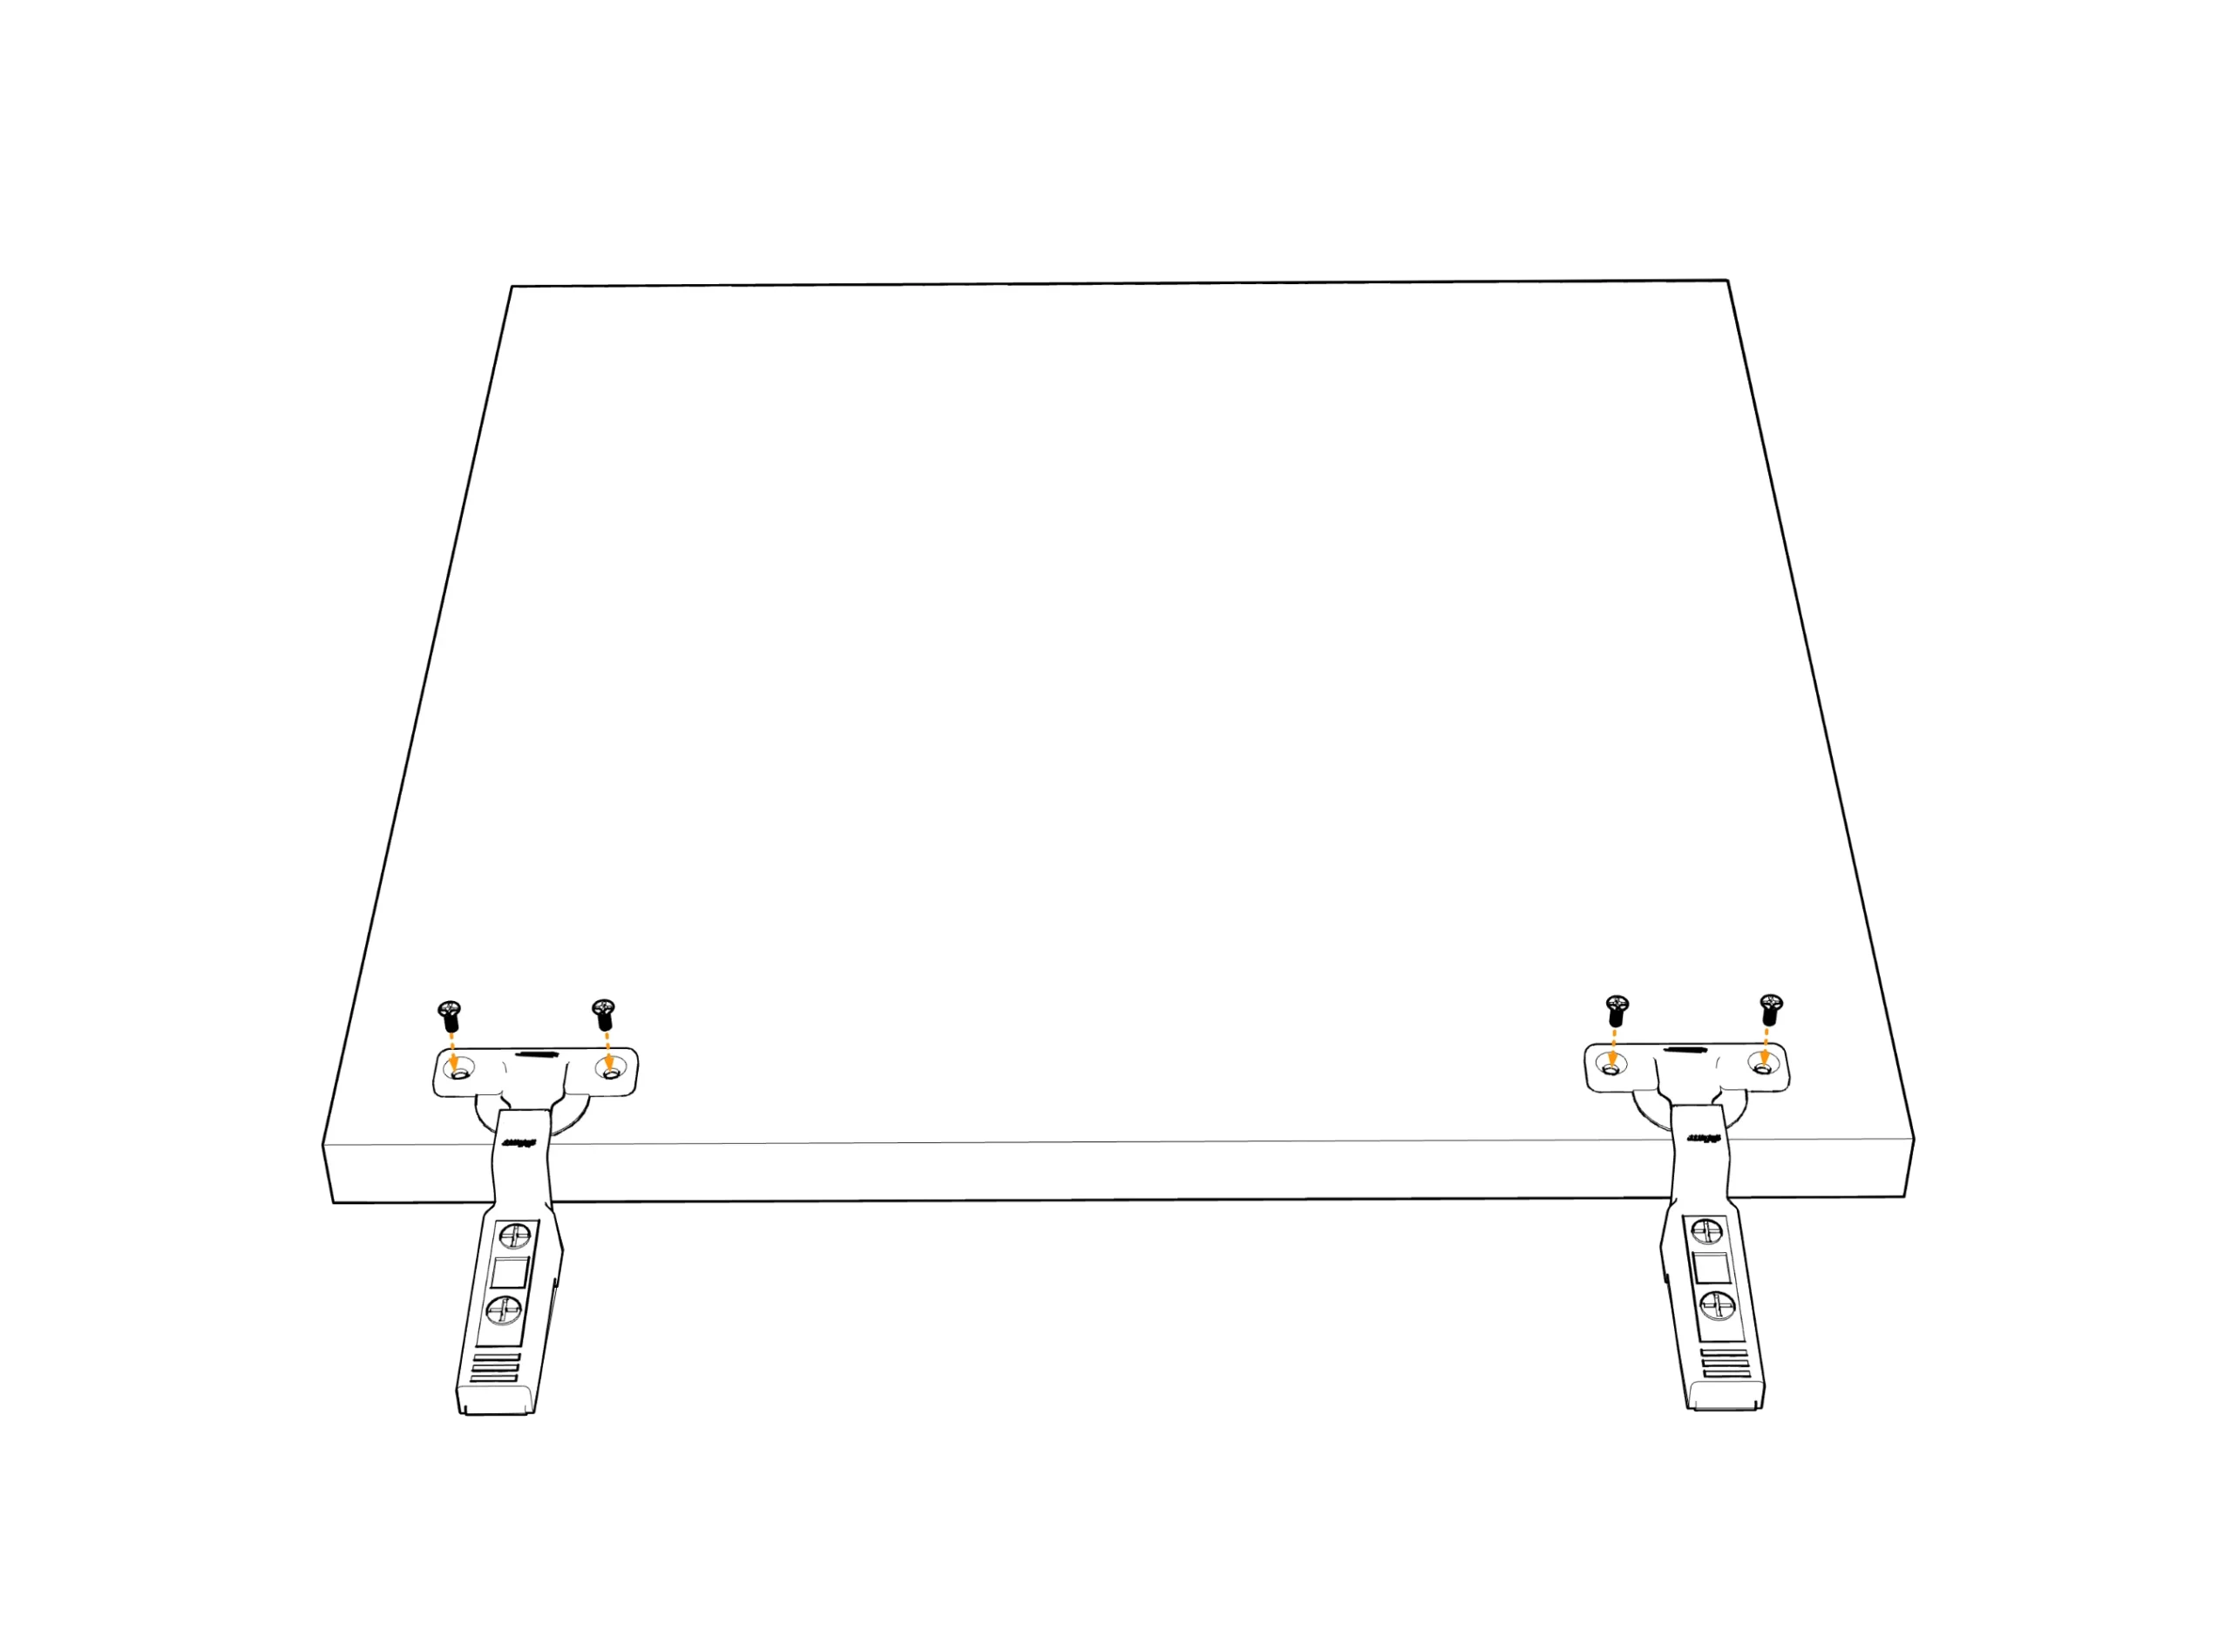
Step 1. Shelf Supports
Make sure you have a pair of right and left-shelf support rods. Start with the shorter part of the arm; align it parallel to the side of the shelf. Next, insert the bottom hook from the top, turn it 90° and slide the short part down into the hole. Before reaching the bend, turn the arm back parallel with the shelf side, then lift the support as you rotate to put it in its final position.
Step 2. Shelf Hanging
Pick up the shelf from the short edges so you can touch the supports underneath with your fingers. Hold the shelf at forty-five degrees to see the bottom hooks at the back. Insert the lower hooks first one at a time, then lift the shelf front until level. Next, insert the top hooks one at a time. If necessary, use a mallet to tap the bracket hooks lightly to set them entirely in the hole.


Cabinets
Assembly
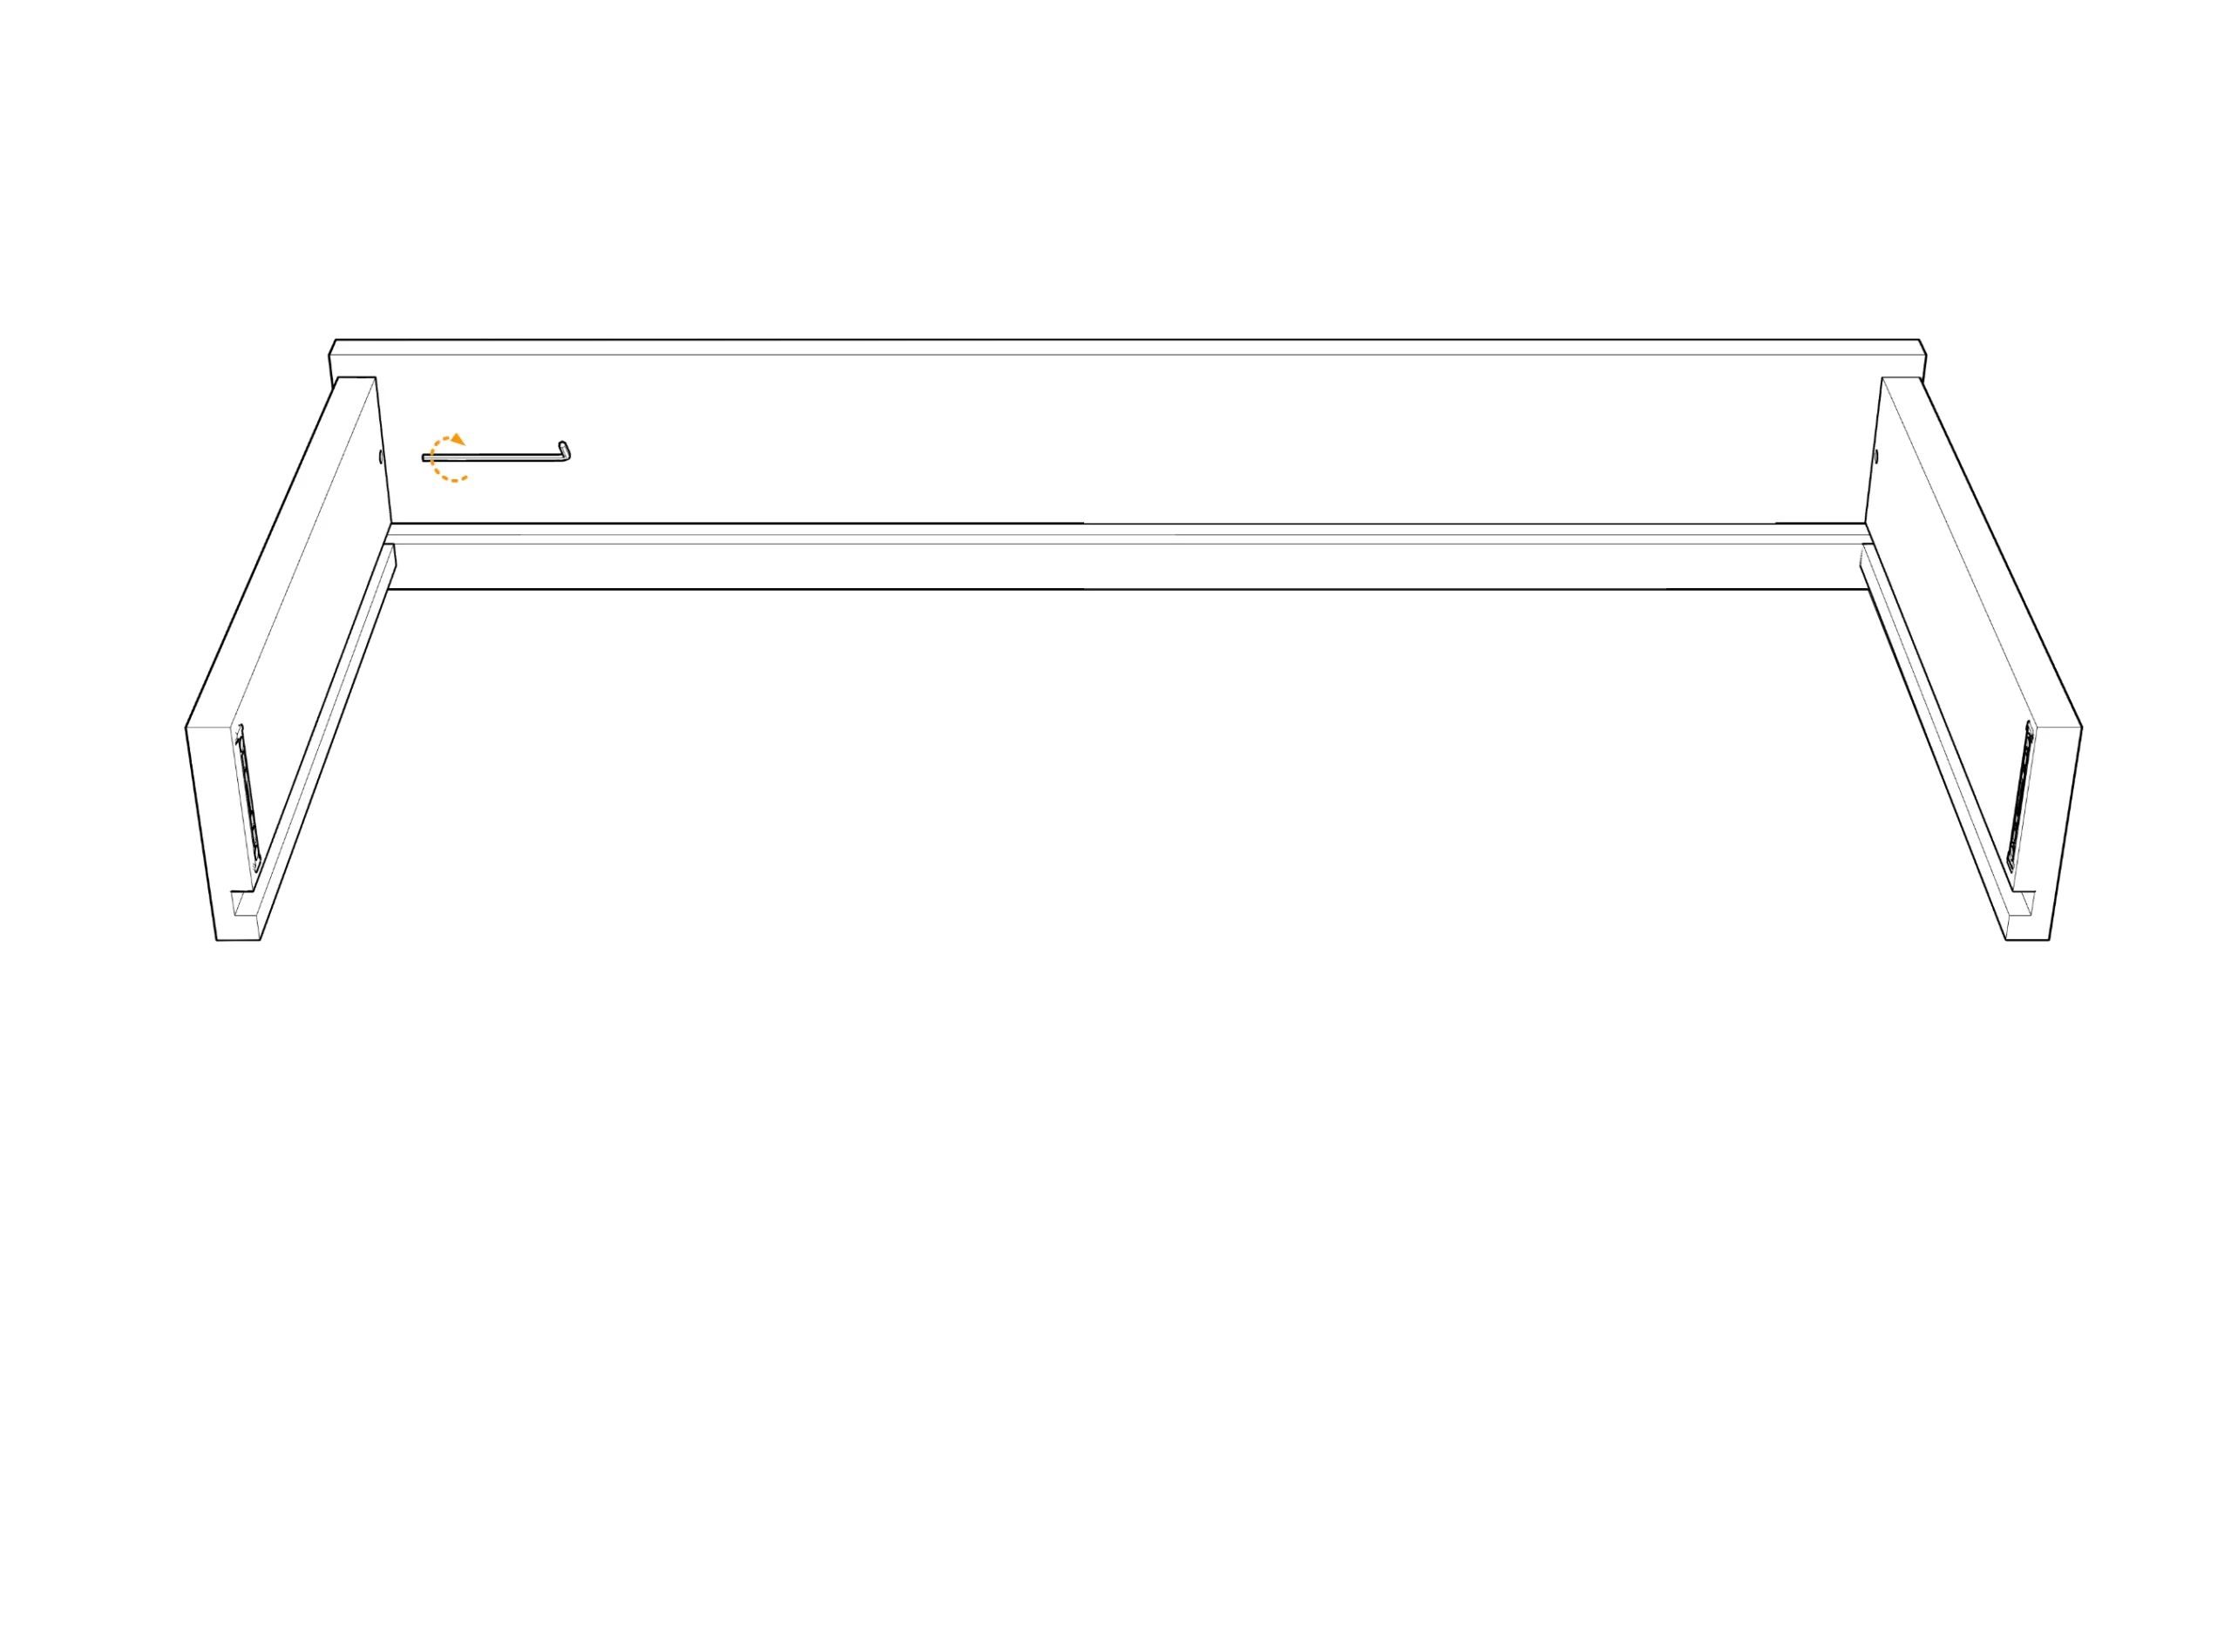
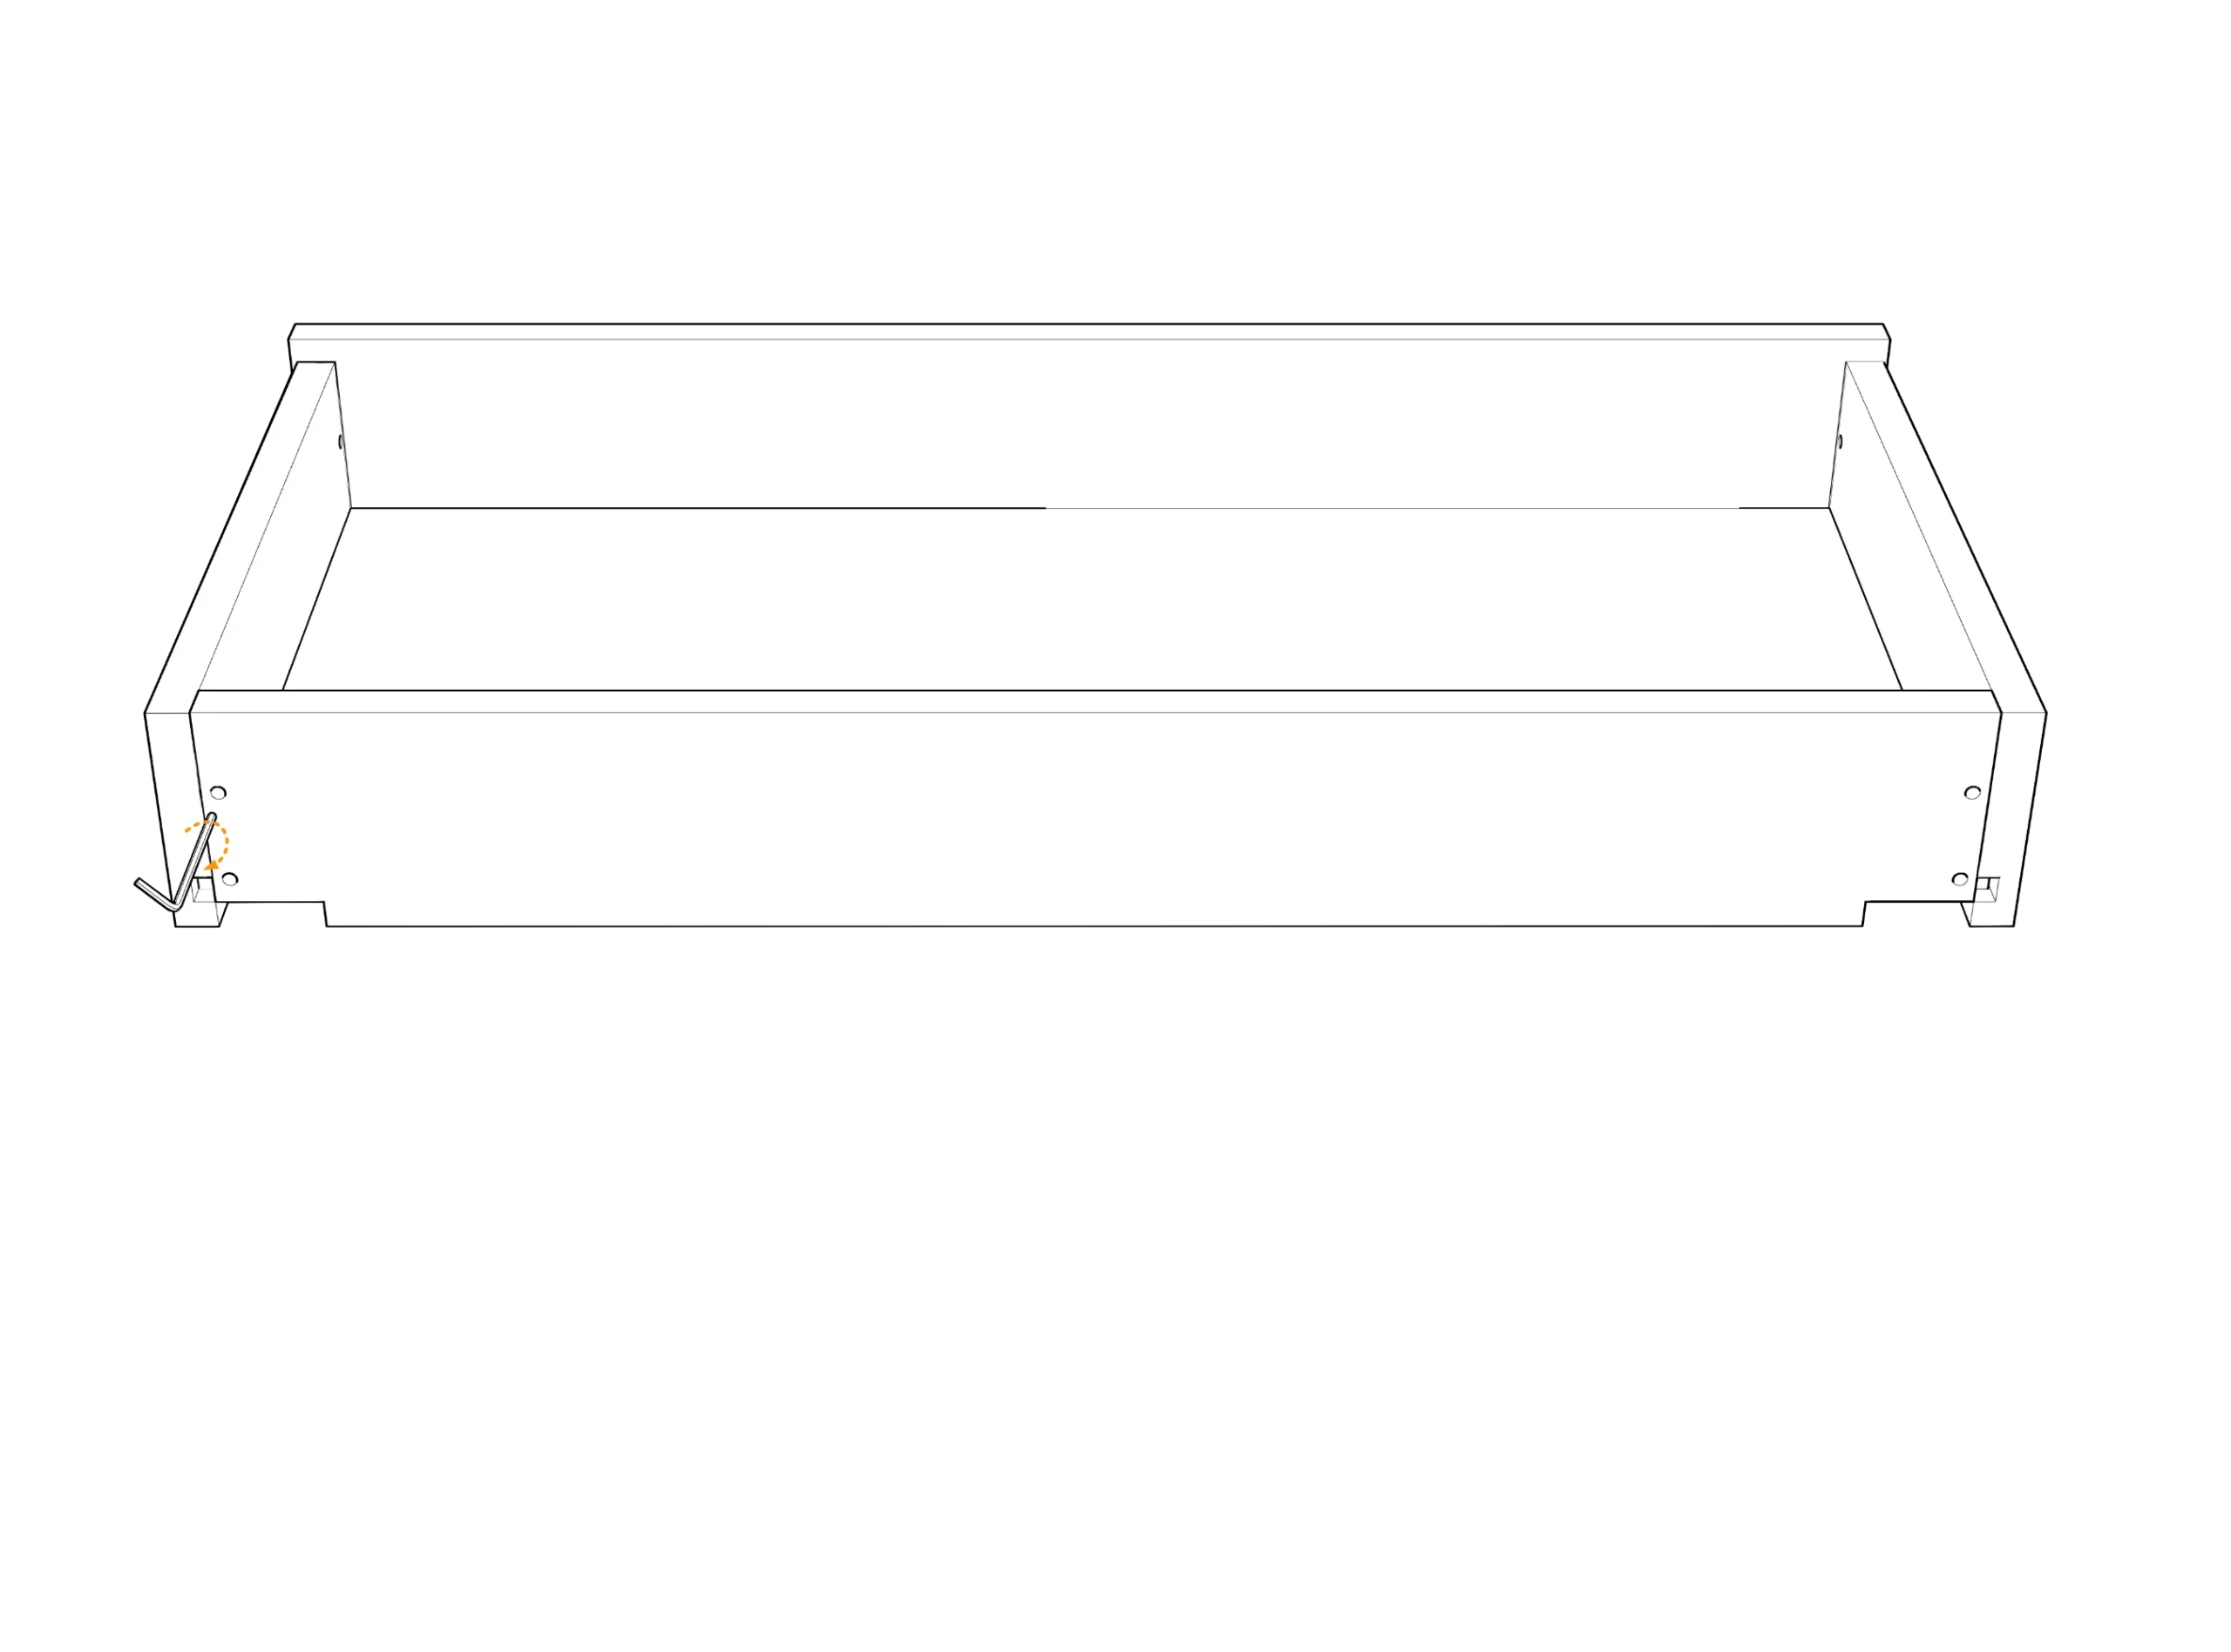
Step 1. Cabinet Supports
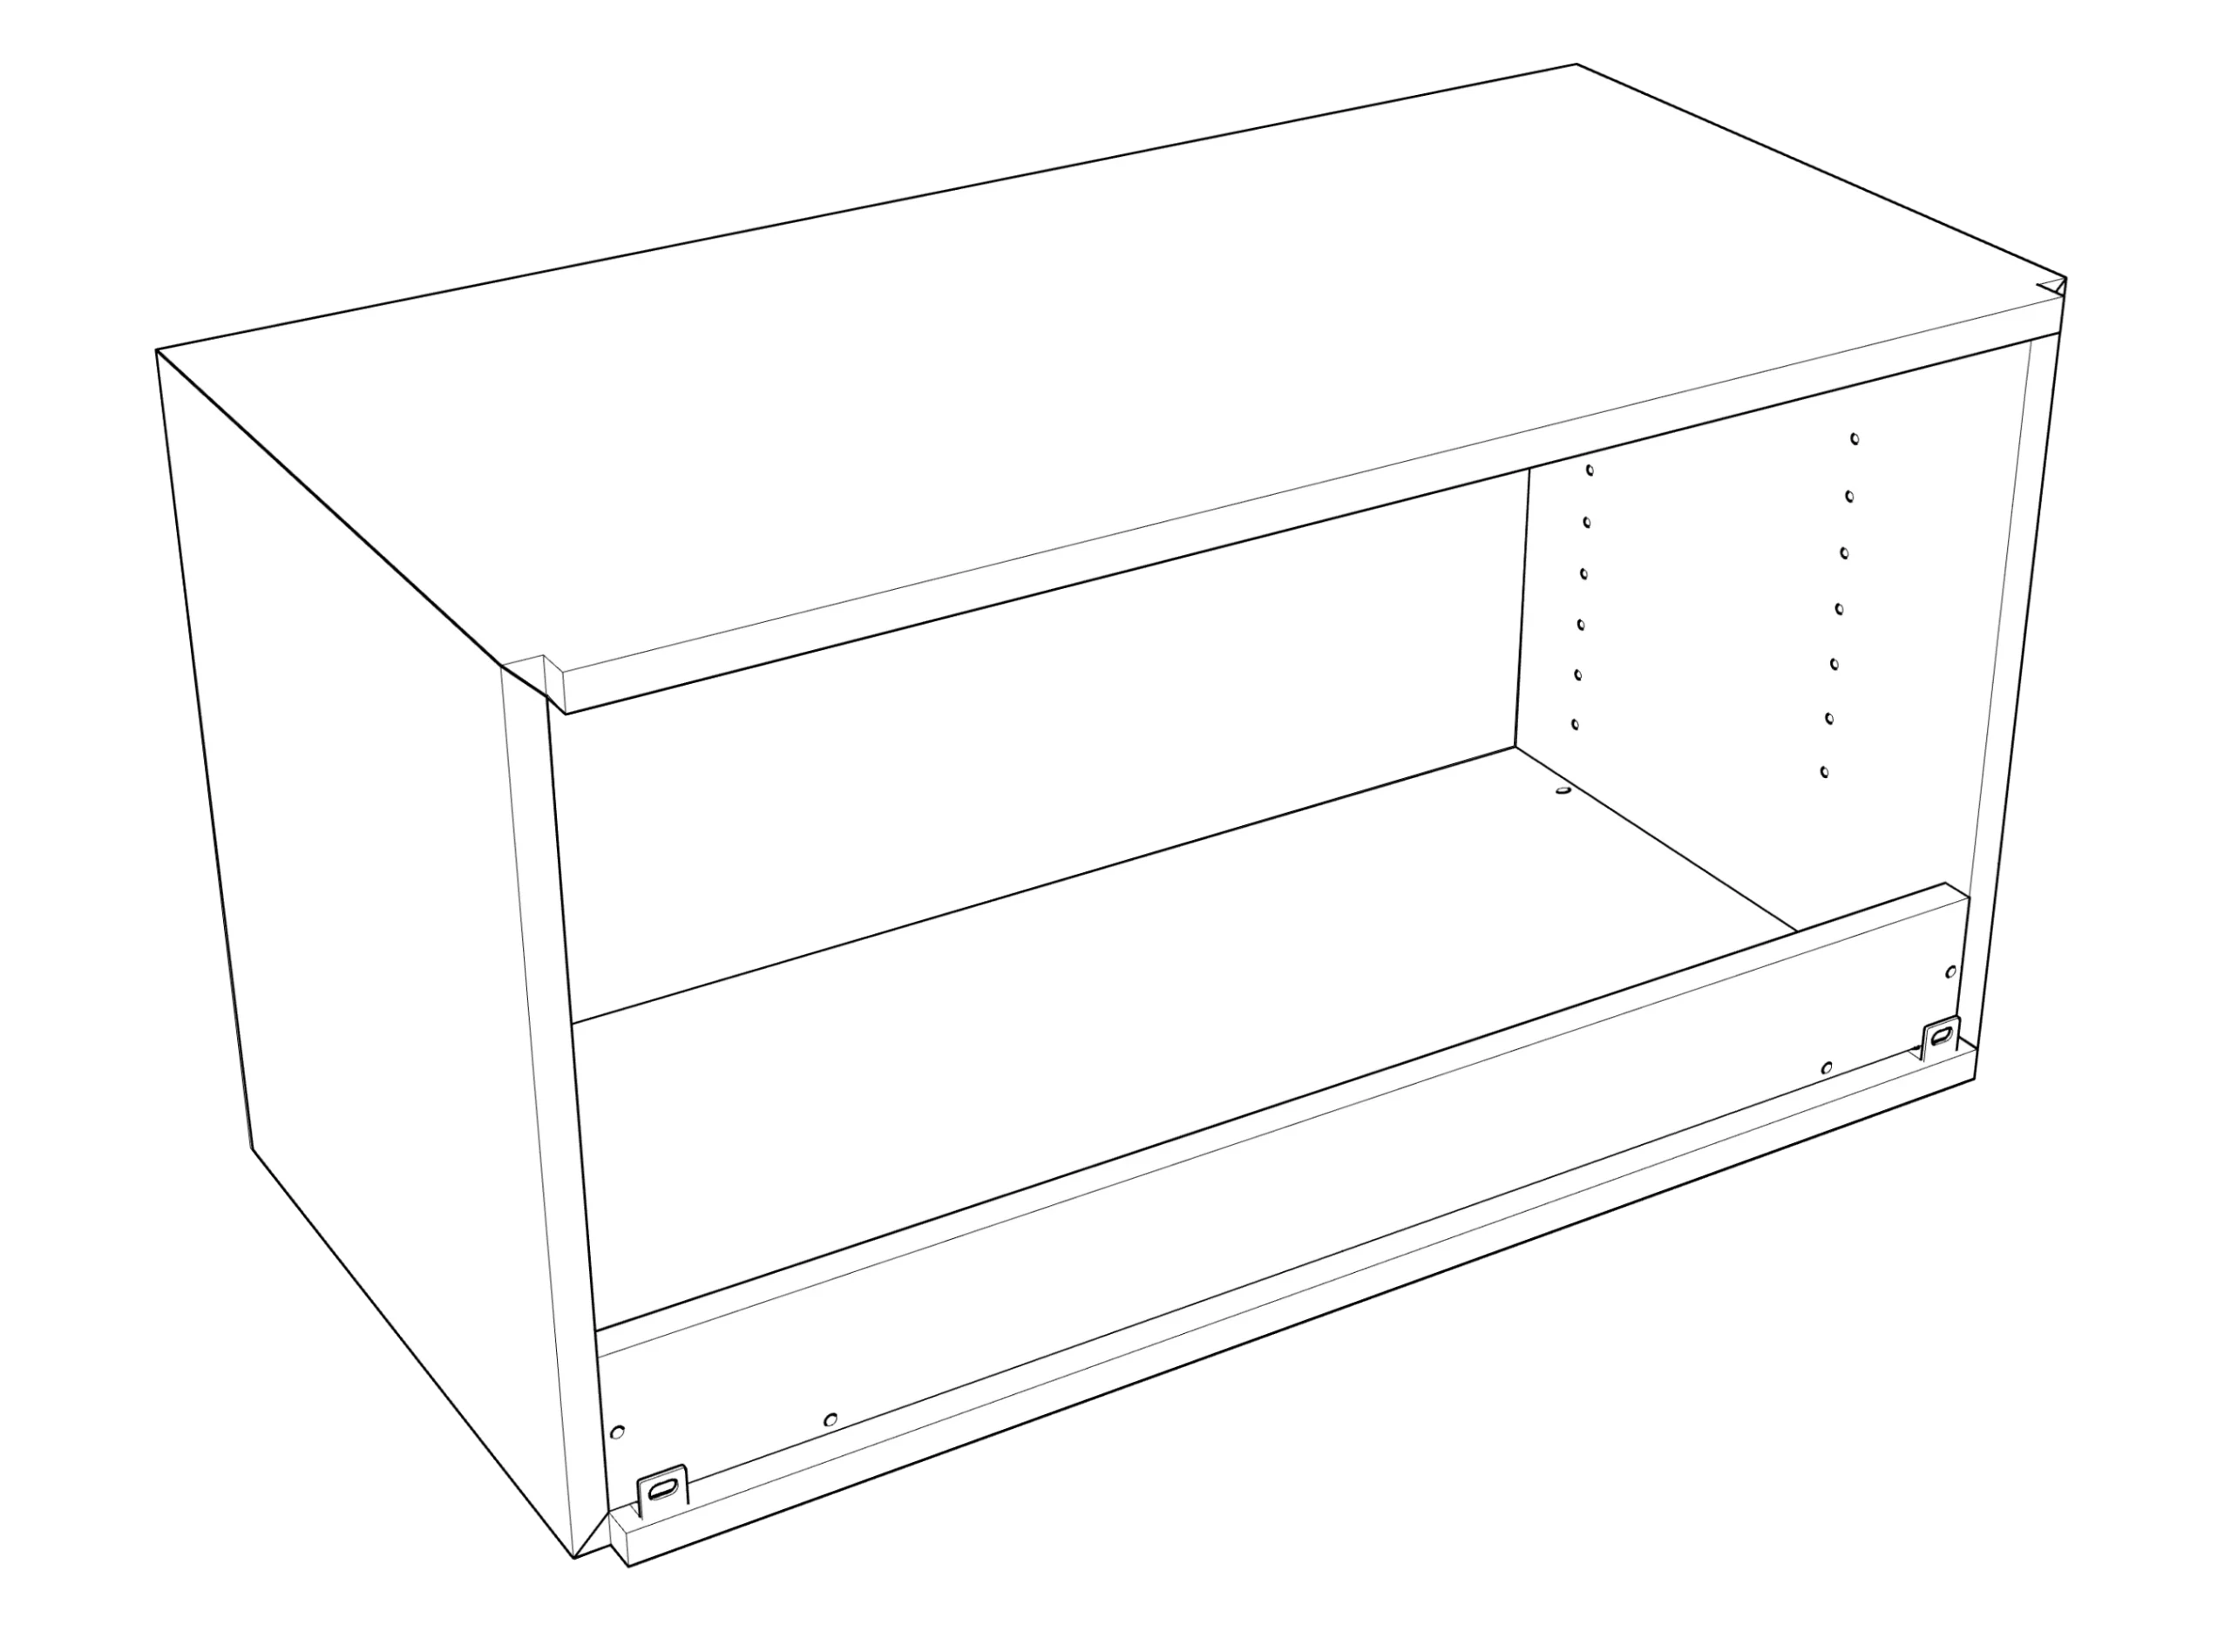
Lay a blanket or towel on a table to protect the panel, then place the cabinet top panel flat with the inside facing up. Next, screw in both angled support brackets at the back.
Step 2. Cross Brace
Place the cross brace into the mating connectors but don’t tighten them yet.
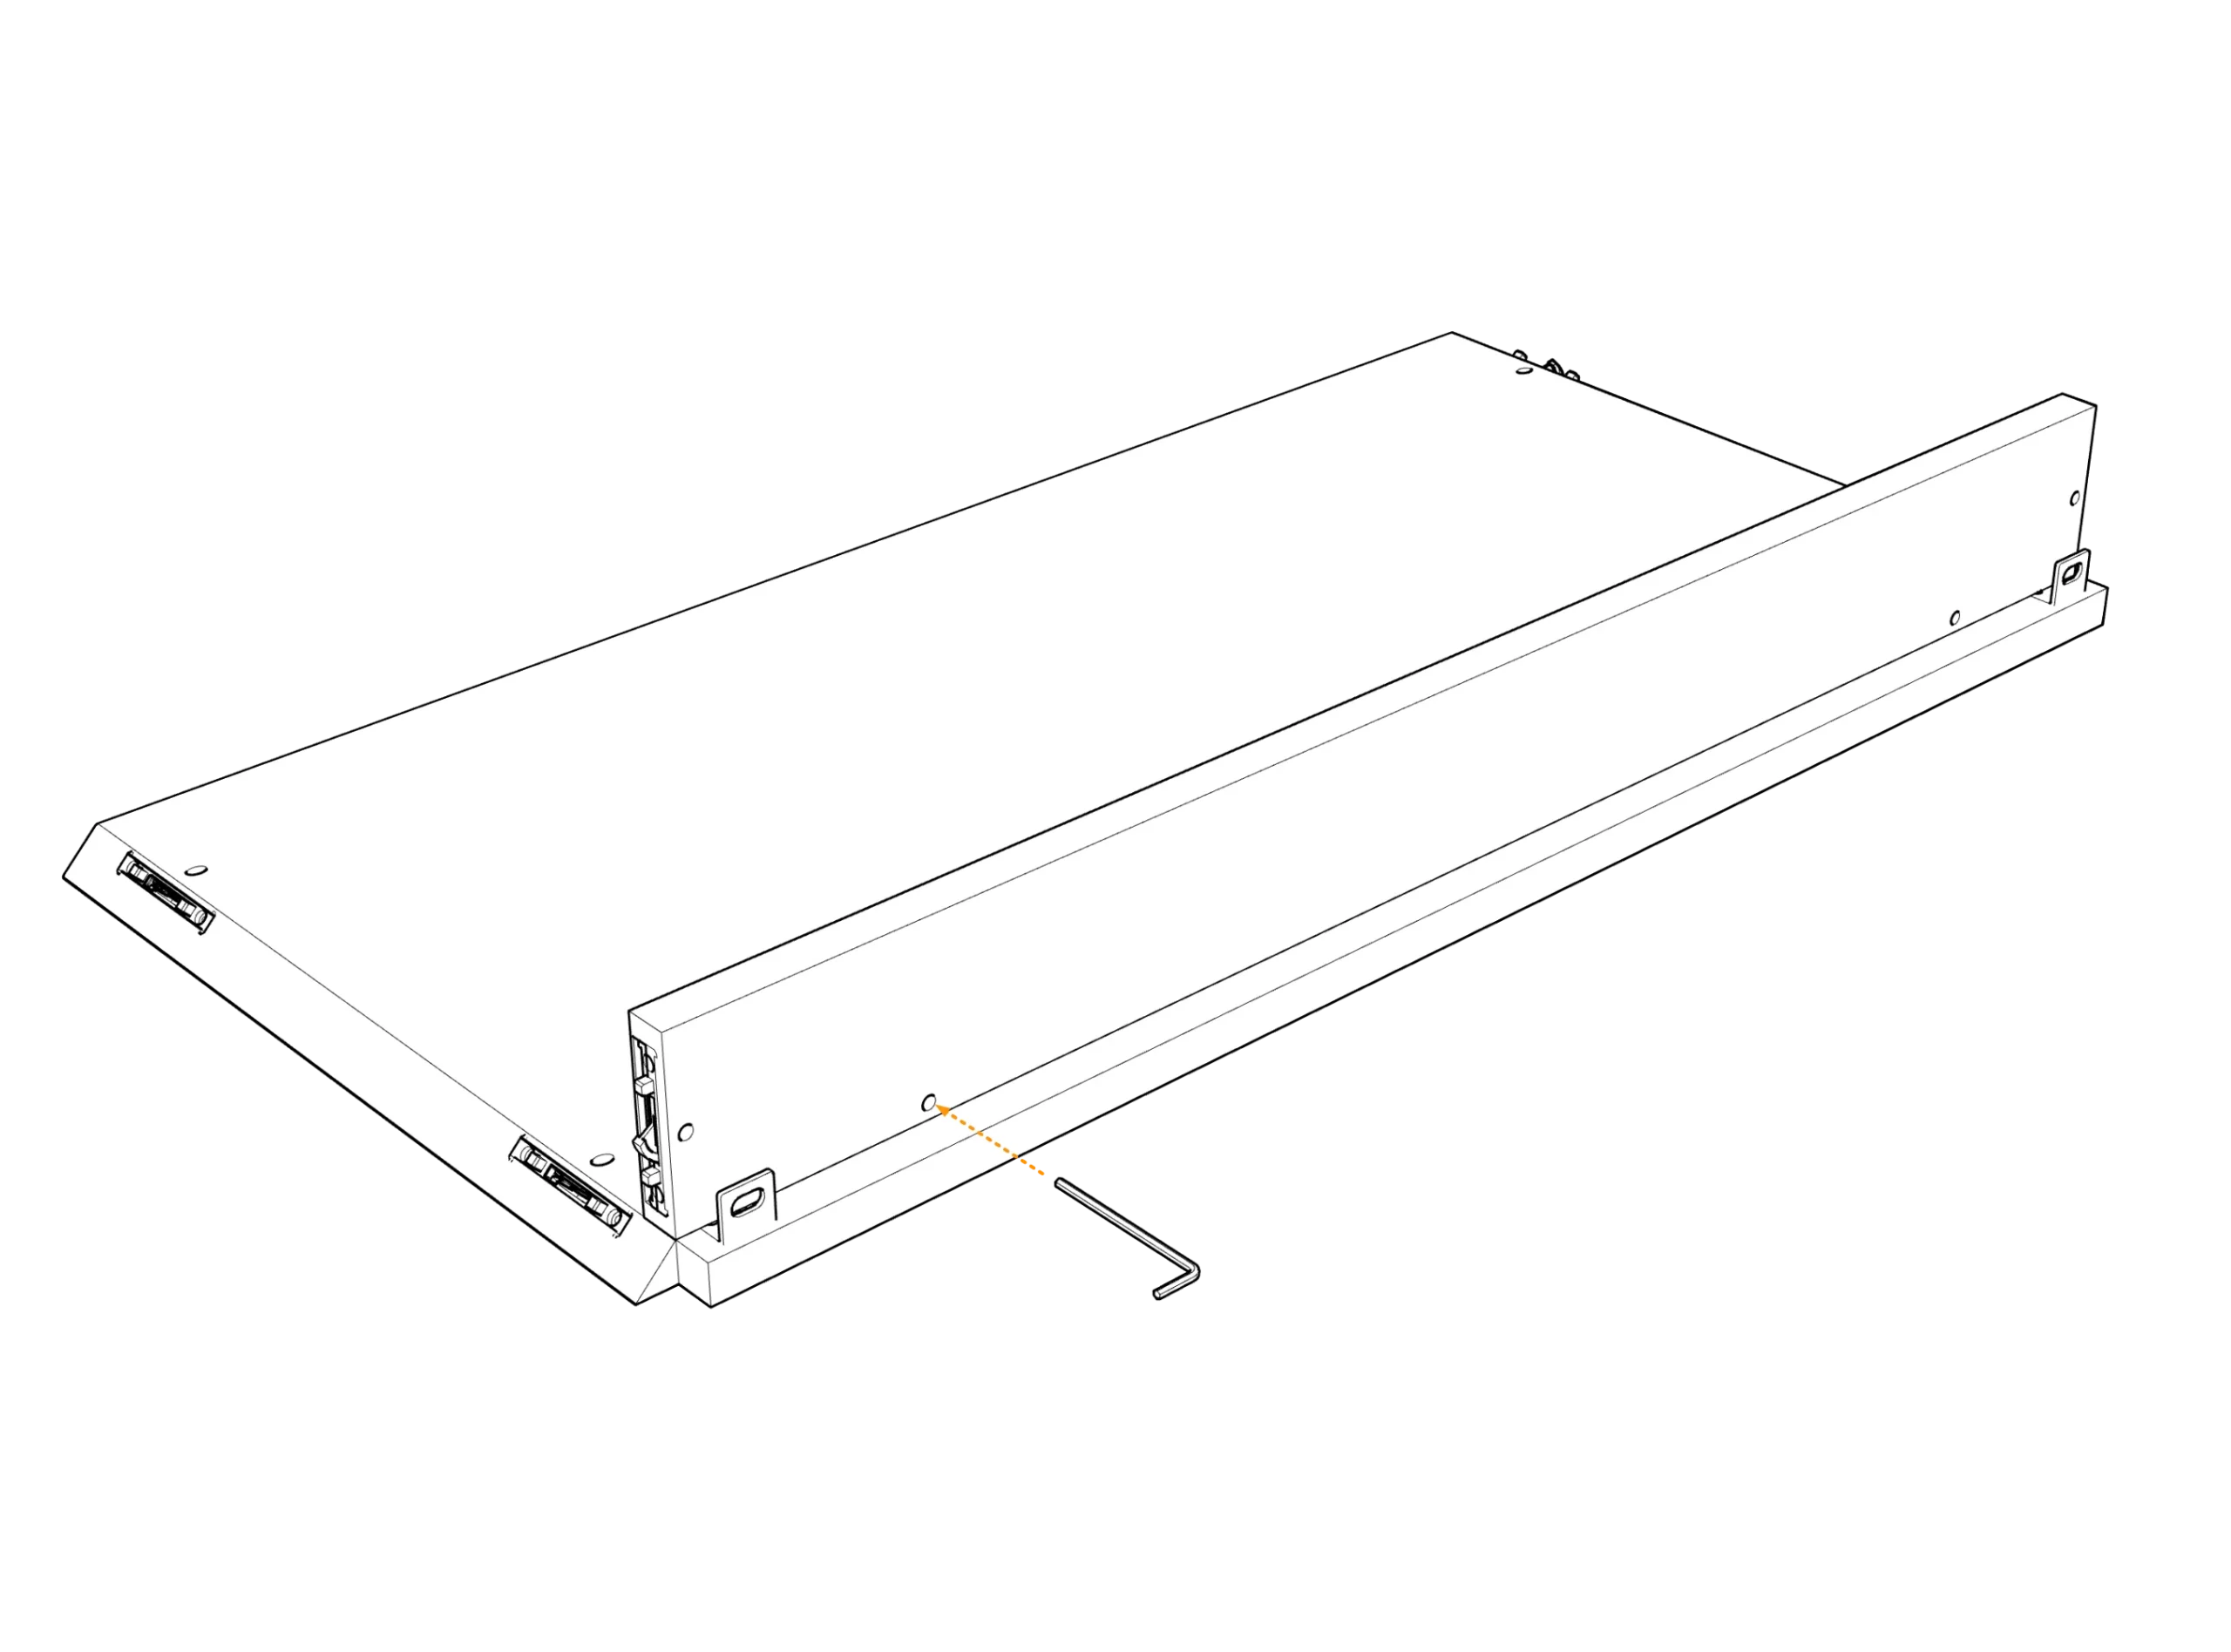
Step 3. Side Panels
Align a side panel to the base, so the connectors mate; there is a small amount of adjustability, so make sure the front edge is flush, then using a 4mm hex wrench, tighten only the front-most panel connection.
Place the second side, tighten the front-most connector again, then tighten the back brace’s vertical connectors.
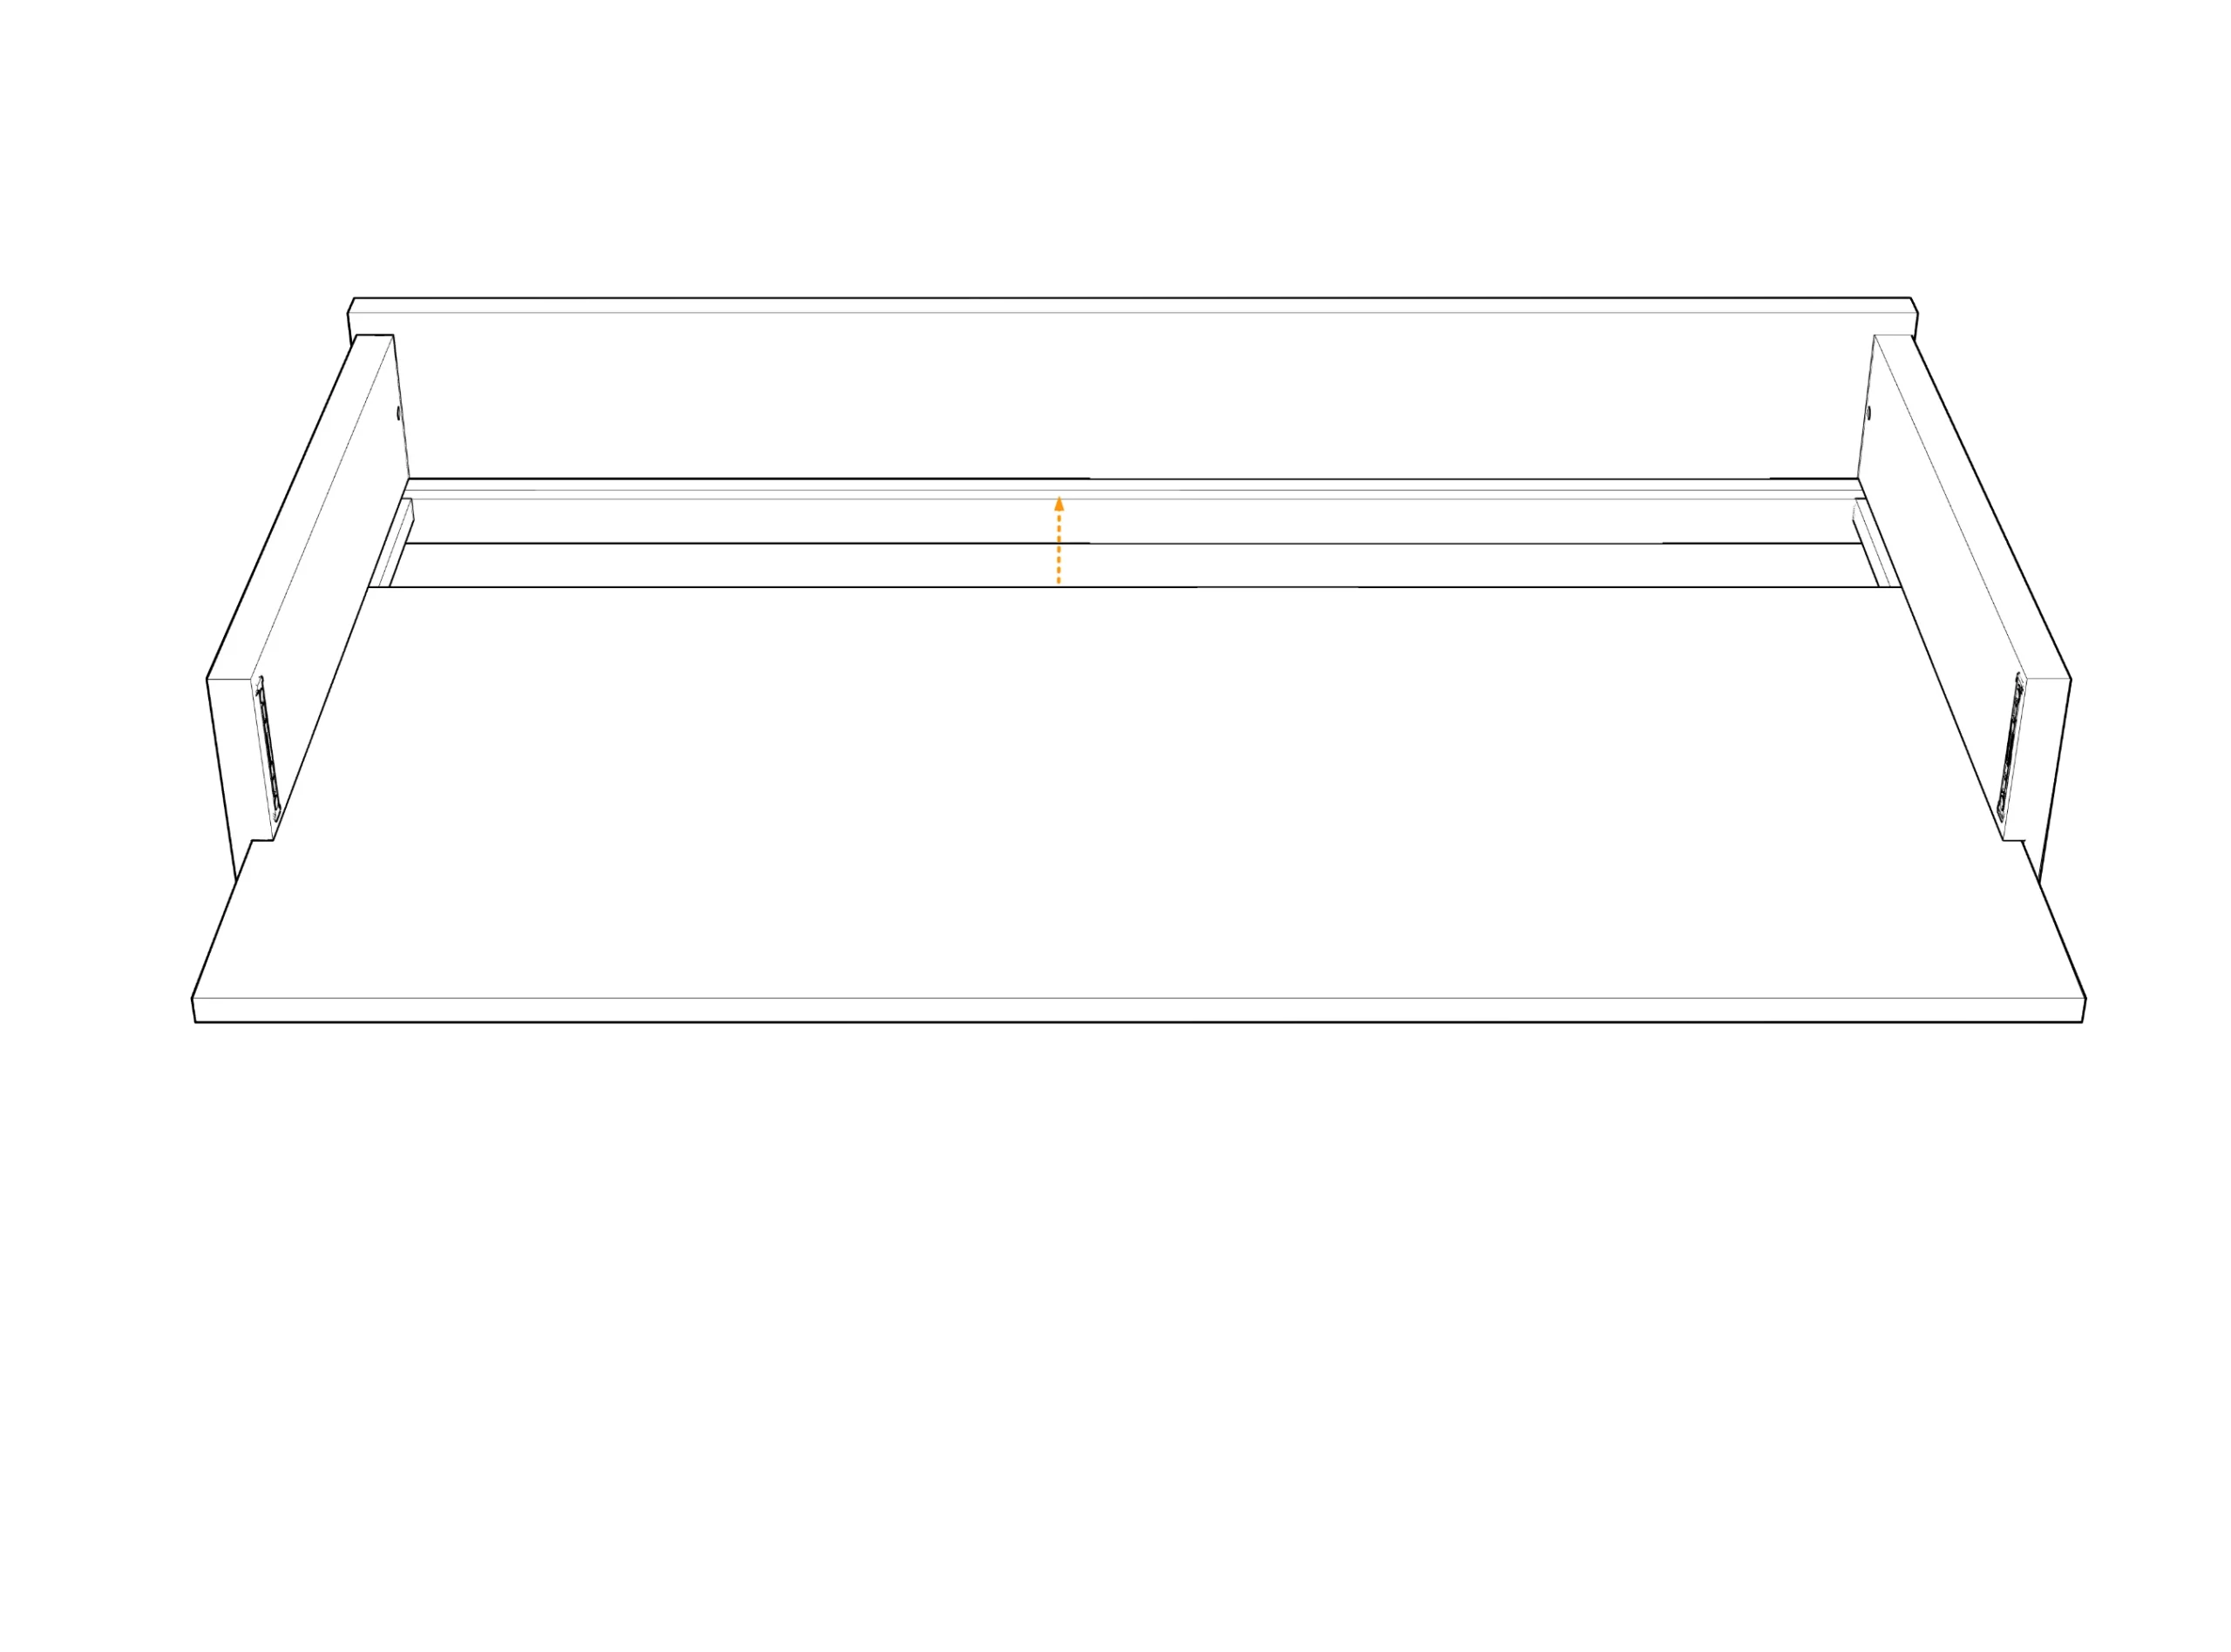
Step 4. Bottom Panel
Once everything is mating up nicely and the front corners are flush, tighten the remaining connection on the side panels and the back brace connectors with the cabinet top. Finally, place the bottom panel on and pull down the same way; now rotate the cabinet right side up.


Installation
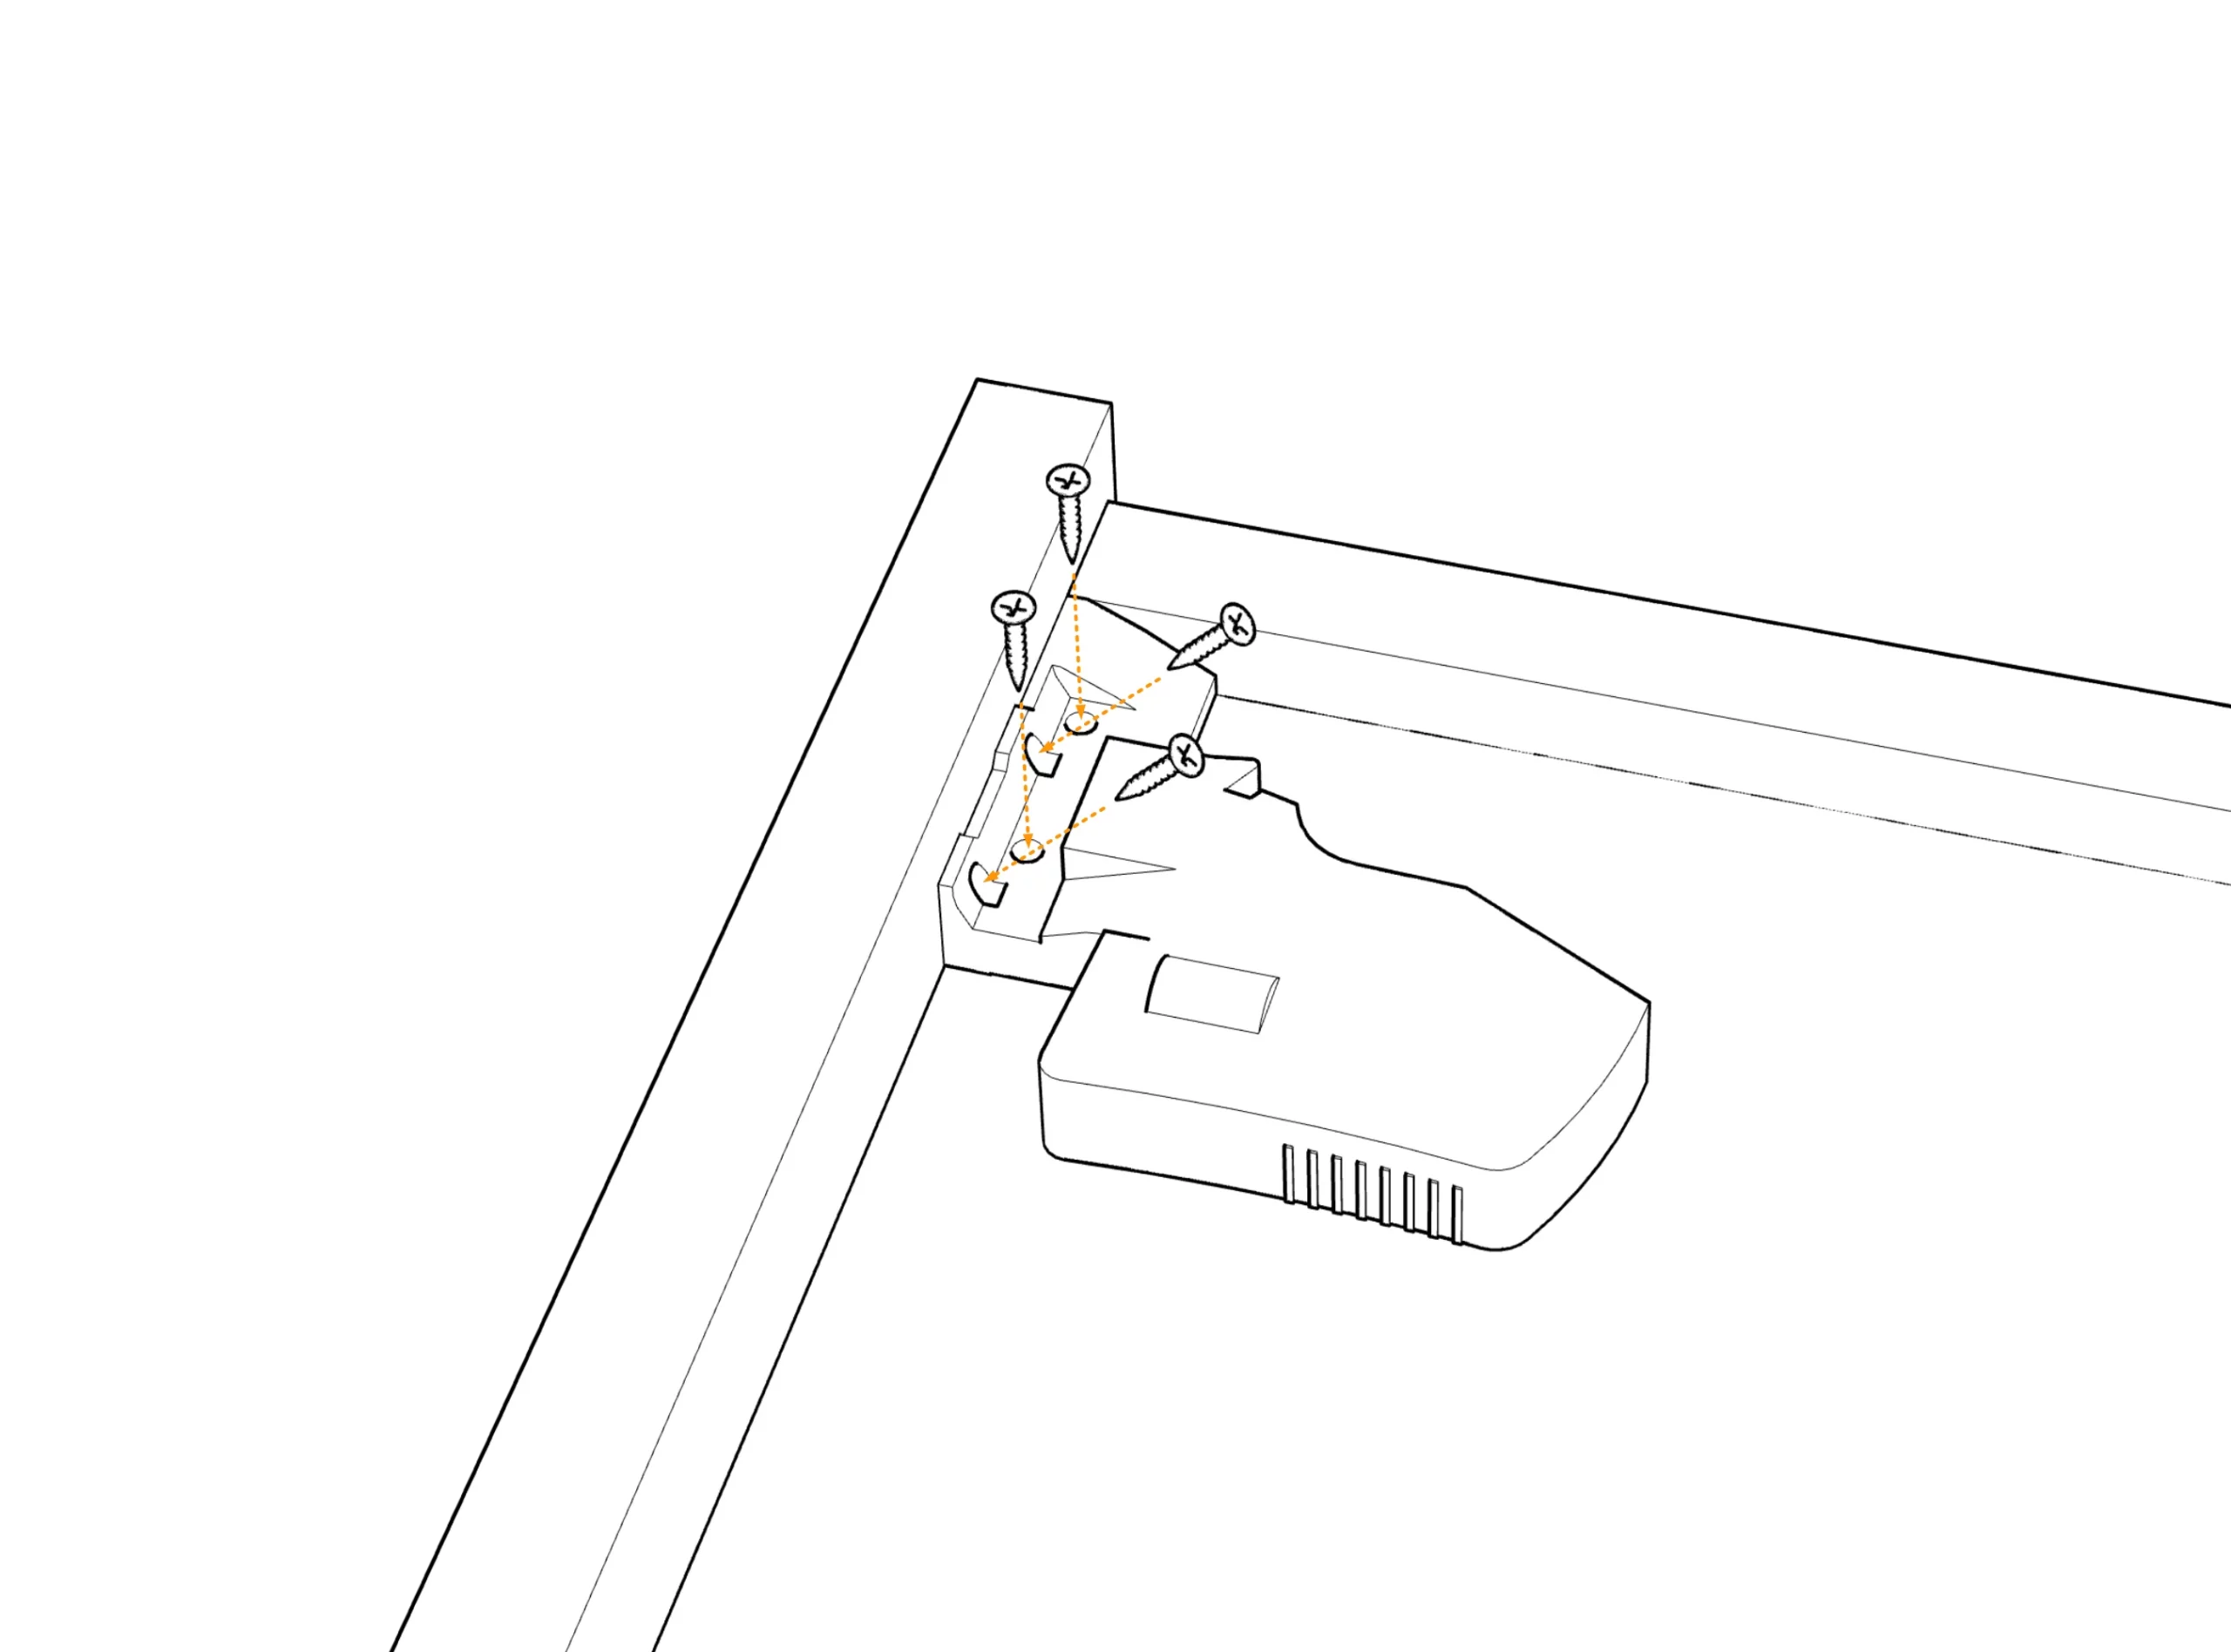
Step 1. Rail Supports
Using a pair of cabinet supports, insert them in the support rails opposite each other with the long flat side facing up. Slide the cabinet in place, resting on the brackets.
Step 2. Hang Cabinet
Slide the cabinet in place, resting on the brackets.


Installation
Doors
Step 1. Hinge Supports
Attach the door hinge clips with 5mm euro screws.
Step 2. Hinges
Attach cup hinges to the doors with the provided wood screws.
Step 3. Attach Doors
Attach the door by snapping the hinge onto the clips
Step 4. Spacing
Using a screwdriver, turn the adjustment screws on the hinge and clip to align the door with even spacing. It helps to loosen the hinge clip on the cabinet side to get the entire adjustment range.


Installation
Doors
Step 1. Hinge Supports
Attach the door hinge supports to the door base panel with the supplied screws.
Step 2. Door base panel
Slide in the flop door base, ensuring it goes flush with the back bottom panel.
Step 3. Door Hinges
Attach the door hinges and gas stay clips with the supplied screws.
Step 4. Flop Door
Place a 3/4” spacer, such as a shelf or a book, in front of the cabinet to level the door with the inside base. Then, use the adjustment screws to align the door with the opening.
Step 5. Gas Stays
Slide the stay into the front slot on the door first, then rotate the gas stay up to slide into the side bracket. Lifting the door makes this easier. Adjust it forward or back to get the door level. Then, tighten the scrub screw to hold it in place. Finally, rotate the nob at the top for fine adjustment.
Step 6. Hang Cabinet
Once the door has been adjusted and aligned, hanging the cabinet with the door removed is much easier.


Installation
Drawer
Step 1. Face
You can lay a blanket or towel on a table to protect the panel, then place it face down.
Step 2. Sides
Insert the two drawer sides making sure the groove for the base lines up, then tighten with the hex key
Step 3. Bottom
Slide the base in and ensure it sits into the back of the drawer face.
Step 4. Back
Attach the drawer back and tighten the two connectors with the 4mm hex key.
Step 5. Slide Clips
Place the two drawer slide clips at each front corner on the bottom. Then secure them in place with screws.
Step 6. Slides
Attach the drawer slide using the 5mm euro screws and a Pozidriv screwdriver into the corresponding holes in the cabinet sides.